
We mostly talk about WorkAdventure as a virtual office or an event venue. Here is a third use that some of our customers stumbled into on their own: a virtual space is a very good place to meet prospects.
Think about it. On a classic website, a visitor reads a page and leaves. You get a line in your analytics and, if you are lucky, a form submission. In a WorkAdventure space, a visitor walks in, looks around, bumps into your product demo, and talks to a real person from your team. If they had to log in at the door, you know exactly who they are. That is a lead, and a warm one.
This article shows how to set that up. It takes three switches in the admin dashboard, and an optional fourth step that wires the whole thing into your CRM.
Prefer to watch? This video walks through all four steps, from the admin switches to a real visitor landing in HubSpot:
What you are building
Two setups work well, and they are the same recipe with a different map:
- A showroom. A dedicated map linked from your marketing website: “Visit our virtual showroom”. Product demos on the walls, a video corner, a meeting room where a sales rep is waiting during office hours.
- Your own office, with the door open. You already work in WorkAdventure. Put a public entrance on your map and let prospects come and find you. Nothing beats “come and see how we work” as a sales pitch when you sell remote collaboration.
In both cases the visitor needs an account to get in, and creating that account is where the lead comes from.
Step 1: make login mandatory
By default, anyone with the link can enter a WorkAdventure room anonymously. That is great for an open event, and useless for lead generation, because an anonymous avatar is not a contact.
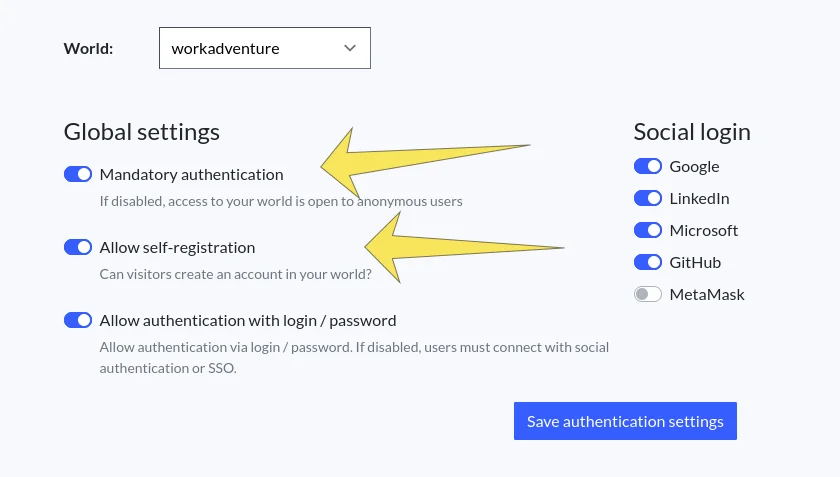
In the admin dashboard, open your world’s access settings and enable Mandatory authentication. From now on, whoever opens the link lands on the login page first.
The full option is described in Manage access to your world.
Step 2: allow self-registration
A login page with no way to create an account is a closed door. Right next to the mandatory authentication switch, enable Allow self-registration.
The login page now shows a Register button, and the social login buttons (Google, LinkedIn, GitHub, Microsoft…) work for newcomers too. One click with a LinkedIn account and the prospect is inside, with their name and email attached to their avatar.
People who register this way are called visitors in WorkAdventure. They are not members of your team: they have no “tags” unlike your members. If you want to reserve a space where only members can enter, you can create a restricted area for people with the “member” tag using the map editor. You visitors may not have tags, but they are authenticated. They can use the chat, and you can see them in your admin dashboard, in the “Visitors list”.
Step 3: declare what you do with the data
Before WorkAdventure lets you see the list of visitors, it asks you to fill in a privacy policy. This is not bureaucracy for its own sake. You are about to collect names and emails from people who are not your employees, and the GDPR wants you to tell them why.
The privacy policy page in the dashboard walks you through it: who you are, what you collect, and for which purposes. Some purposes are covered by legitimate interest, like running the space itself. Others rest on consent: sending a newsletter, announcing your next event, sharing data with a third party. Tick the ones you need.
Here is the part that makes this a lead generation tool and not just a signup form: for every consent-based purpose you declare, WorkAdventure asks each visitor the question itself, in-world, and records the answer. You do not have to build a consent form. You do not have to guess whether an email in your export can legally receive your newsletter.
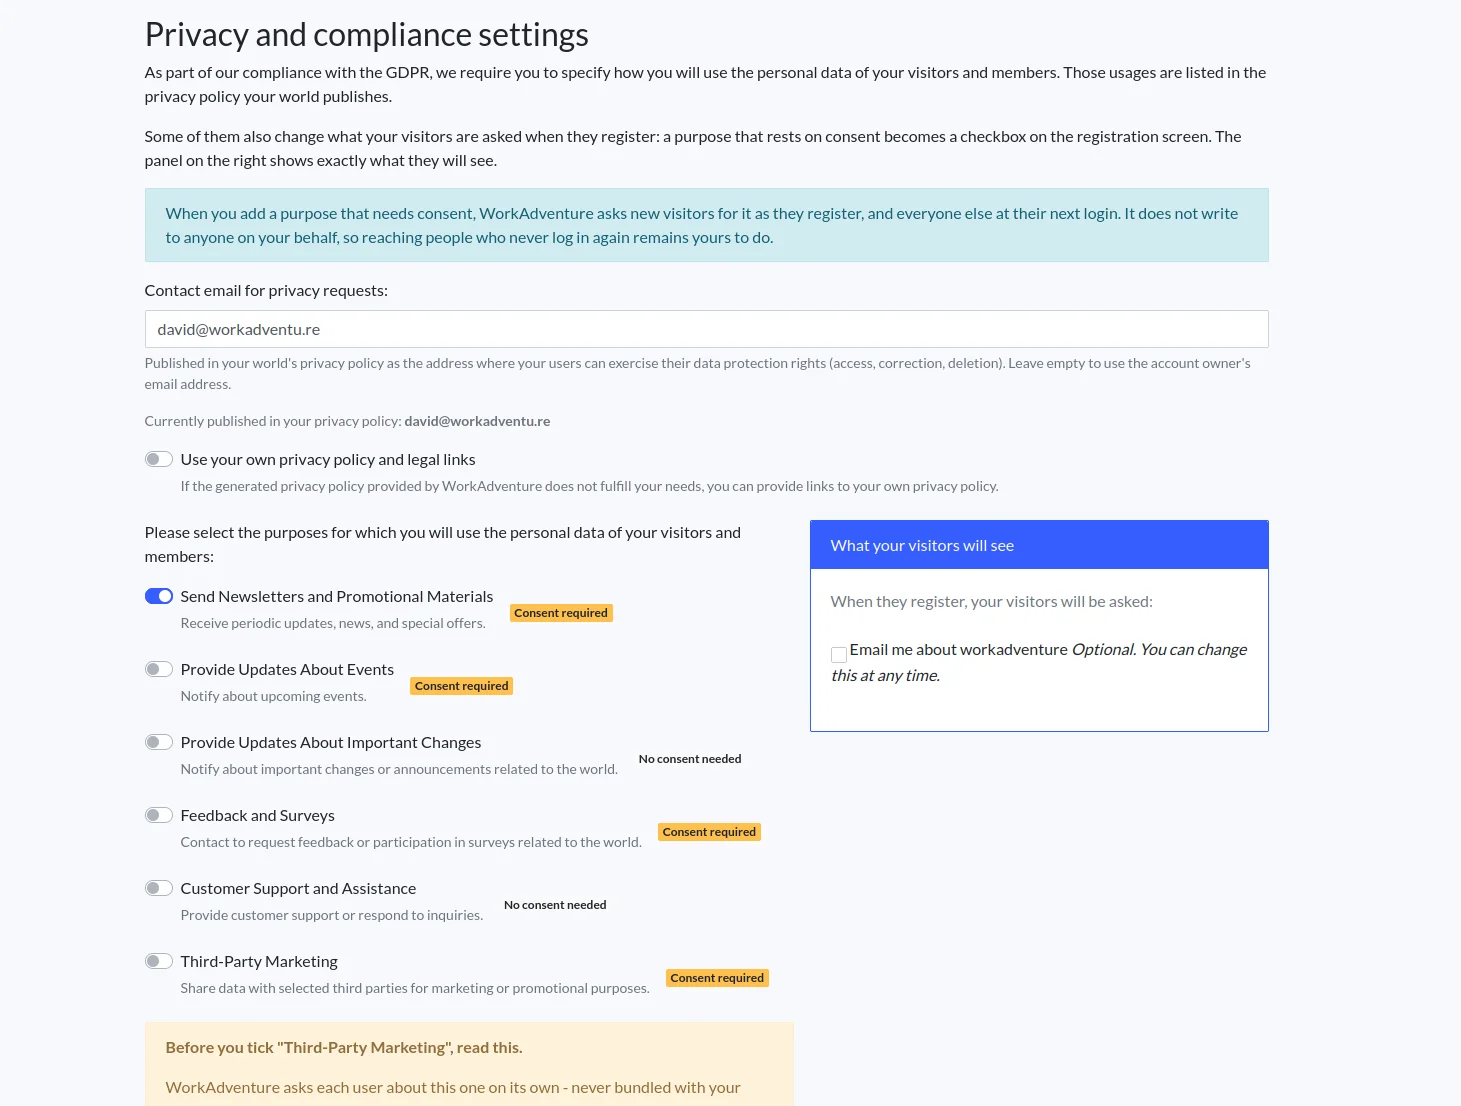 See Configuring your privacy policy.
What you get: the visitors list
Open Visitors in the sidebar of the dashboard. Every self-registered account is there, in a sortable, filterable table: name, email, registration date, and one column per consent question you declared, with three possible values: granted, denied, or not asked yet.
Hit Export, and you have a CSV that is ready to import into your mailing tool, with the consent status and its last update date on each line. No cleaning pass, no “did they agree?” spreadsheet.
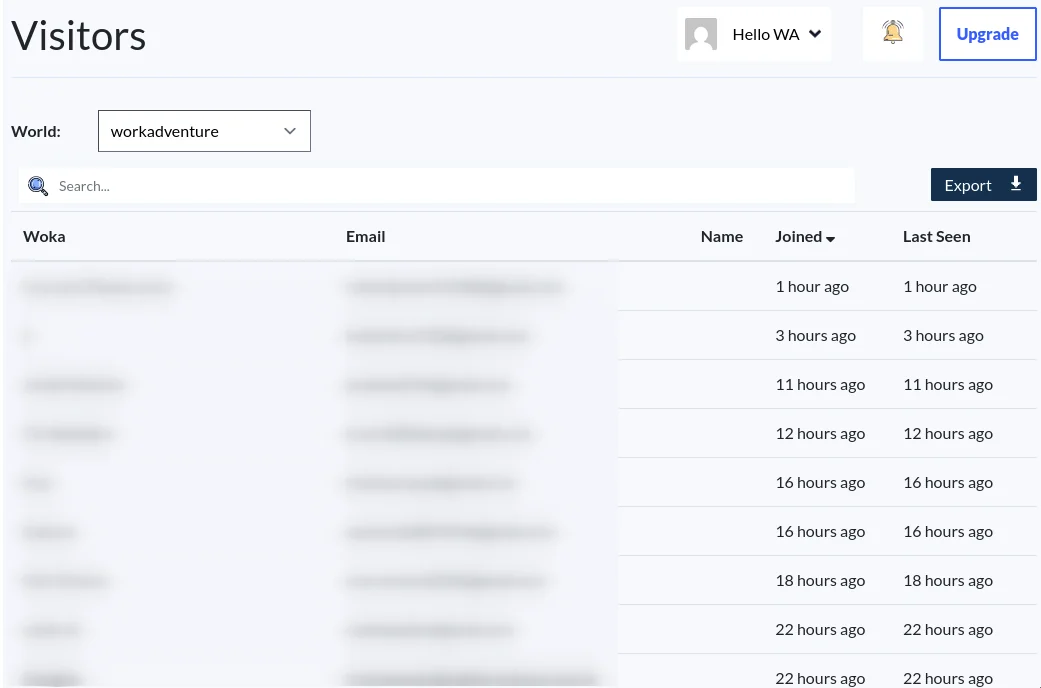
Details are in Access the visitors list.
Step 4 (optional): push visitors into your CRM in real time
Exporting a CSV once a week is fine for a newsletter. For a sales team, you want the lead in the CRM the minute the prospect walks in, ideally with a notification to whoever is on duty in the showroom.
WorkAdventure has webhooks for exactly this, and a WorkAdventure node for n8n that receives them for you. Each time someone connects to your world, WorkAdventure tells your n8n workflow who they are and which room they entered. The rest is drag and drop:
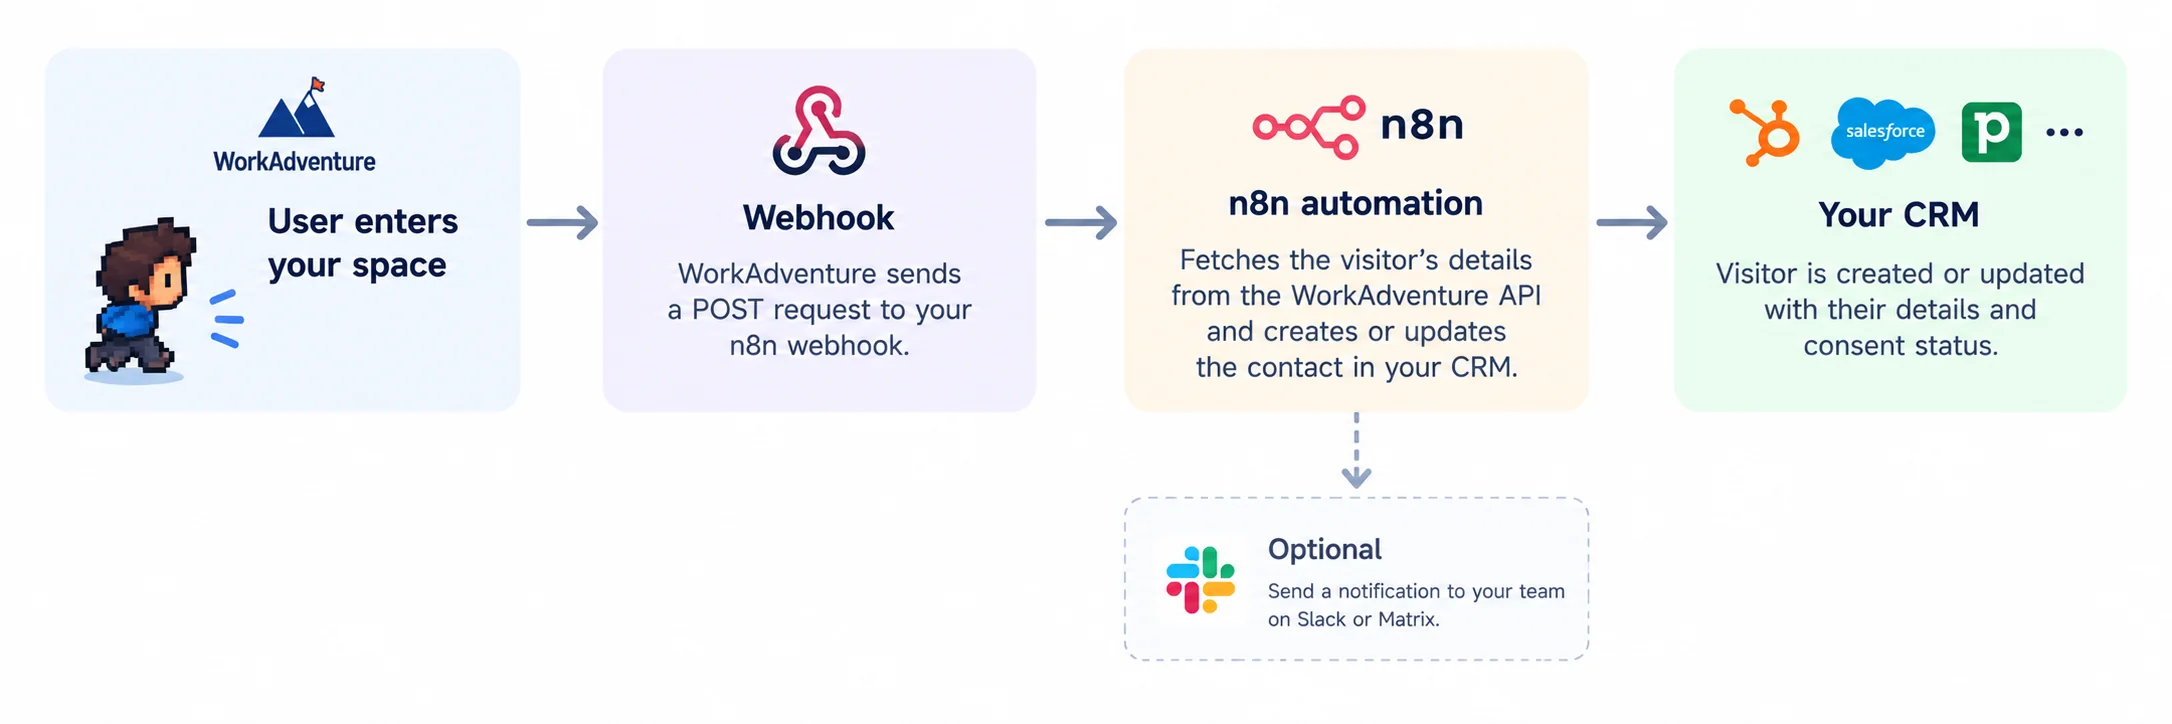
- WorkAdventure Trigger node, with the Member Connecting event. There is nothing to set up in WorkAdventure: activating the workflow subscribes it. The event contains the visitor’s
uuidand theroomUrlthey entered. - WorkAdventure node, operation Get, with that uuid. It fetches the visitor’s name, email and consent answers from the inbound API.
- CRM node. HubSpot, Pipedrive, Salesforce, Brevo… n8n has a node for most of them. Do an upsert keyed on the WorkAdventure uuid, not a create: the event fires on every connection, so the same visitor will come through again each time they return.
- Optionally, a Slack or Matrix node. “Alice from Acme just entered the showroom” in your sales channel, with a link to the CRM record.
Prefer Zapier? Its New Member Connection trigger followed by Find Member does the same. And if you only want each lead once, use the Visitor Registered event (New Visitor in Zapier) instead: it fires a single time, when the visitor’s account becomes usable.
Want that once-per-lead version click by click? The Send new visitors to your CRM cook book builds it with HubSpot, screenshots included, and keeps the newsletter consent in sync too.
A visitor who came back three times this week is a much better lead than one who registered once and left. Store a last_seen date and a visit counter on the CRM contact and you get a simple engagement score for free.
One thing to remember: pushing data to a CRM is a third-party transfer. Declare it in your privacy policy, and if you declared it as consent-based, only sync the visitors who granted it. The inbound API gives you the consent status, so that is one filter node away. A second workflow on the Consent Changed event can then stop syncing someone the moment they withdraw it.
One important thing to keep in mind
Unsubscribes do not flow back. WorkAdventure does not send your emails. If a visitor unsubscribes in your mailing tool, WorkAdventure still thinks they agreed, and the next export will say so. Either mirror the unsubscribe back into WorkAdventure by editing the visitor, or make your mailing tool the source of truth after the first import. The docs describe both options.
Try it
The visitors list, the privacy policy assistant, the webhook and the inbound API are all part of the Premium plan. If you already have a WorkAdventure world, the three switches take five minutes. If you do not, start a free trial, draw a showroom with the map editor, and open the door.
We would love to hear how it goes. Tell us on [email protected] if you turn your virtual space into a lead source, and we might feature you in a customer story.